The Ultimate Guide to Paint Perfection for Ceramic Coating in Roseville, CA
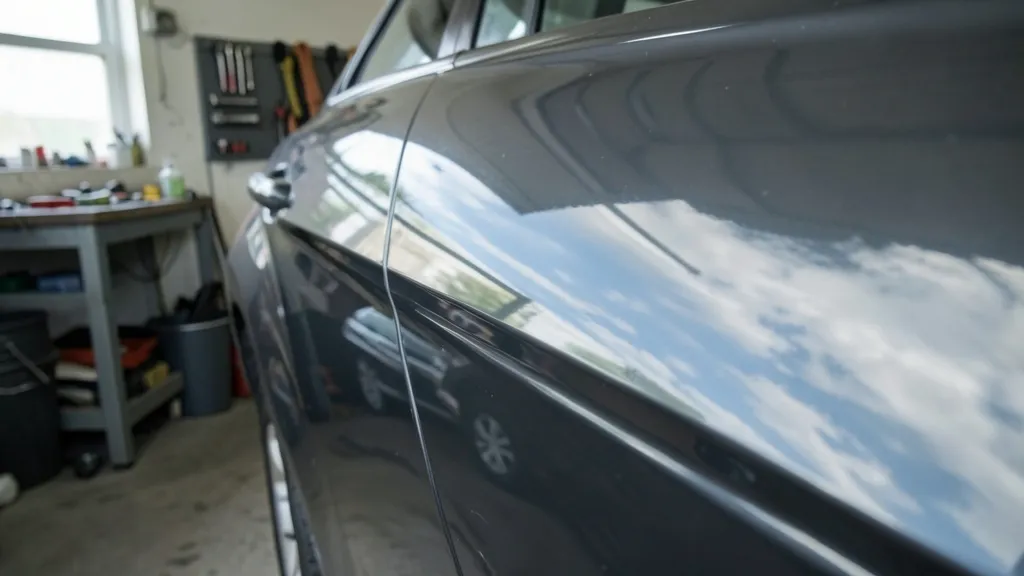
Achieving a mirror-like finish isn’t just about the ceramic coating—it starts with perfect paint. In Roseville’s harsh sun and seasonal dust, even minor imperfections get magnified under a high-gloss ceramic layer. Our team breaks down the exact steps to prep your vehicle’s surface for maximum durability and shine.
Why Paint Perfection Matters Before Ceramic Coating
Ceramic coatings bond permanently to your clear coat, so any flaws—swirls, scratches, or oxidation—get locked in forever. In Roseville’s dry climate, UV rays and road grit accelerate paint damage, making prep non-negotiable.
A coating amplifies what’s underneath. Glossy, defect-free paint reflects light evenly, while rough surfaces scatter it, dulling the finish. That’s why we insist on paint correction before any full-vehicle ceramic coating or PPF installation.
Applying ceramic coating over swirls or water spots traps them permanently. Correction is the only way to ensure a flawless, long-lasting finish.
Step 1: Assessing Your Paint’s Condition
We start with a paint thickness gauge to measure clear coat depth. Thin paint—common on older vehicles in Roseville—limits how aggressively we can correct without risking burn-through.
Next, we inspect under halogen lights for swirls, scratches, and oxidation. Roseville’s summer heat and winter rain leave unique patterns, like water etching on hoods and roofs.
Deep Cleaning: The Foundation of Paint Correction
A two-bucket wash with pH-neutral shampoo removes surface dirt. Then, we use a clay bar to pull embedded contaminants—like brake dust or industrial fallout from Lincoln or Antelope roads—that washing misses.
After decontamination, an IPA (isopropyl alcohol) wipe-down removes oils and residues. This step is critical before polishing, as any leftover wax or sealant can clog pads and reduce effectiveness.
Pre-Correction Cleaning Checklist
- Two-bucket wash with grit guards
- Clay bar treatment (lubricated)
- Iron remover spray for stubborn contaminants
- IPA wipe-down (50/50 mix with distilled water)
- Dry with high-quality microfiber towels
Paint Correction: Compounding vs. Polishing
Compounding uses abrasive pads to level deep scratches and oxidation. It’s aggressive but necessary for heavy defects, especially on single-stage paints common in classic cars around Granite Bay.
Polishing refines the surface with finer abrasives, restoring clarity and gloss. For most modern basecoat-clearcoat systems in Roseville, a two-step polish (medium then fine) delivers showroom results.
| Process | Abrasiveness | Purpose | Best For |
|---|---|---|---|
| Compounding | High | Remove deep scratches, oxidation | Heavy defects, single-stage paint |
| Polishing | Medium/Low | Refine finish, enhance gloss | Swirls, light scratches, final shine |
| Finishing Polish | Very Low | Jewel-like clarity | Final step before coating |
Machine Polishing: Tools and Techniques
We use dual-action (DA) polishers for most jobs—they’re safer for beginners and reduce hologram risks. Rotary buffers, while faster, require expert hands to avoid burning through clear coat.
Pad selection matters: wool pads cut fast for compounding, while foam pads (orange for medium, white for fine) are ideal for polishing. Roseville’s dusty conditions mean we often swap pads mid-job to avoid re-contaminating the surface.
Always polish in 2x2 foot sections, overlapping passes by 50%. This ensures even correction and prevents missed spots, especially on curved panels like fenders.
Handling Roseville-Specific Paint Issues
Water spots are rampant here due to hard water and summer sprinkler overspray. We treat them with a targeted compound or, for etched spots, a light wet-sanding followed by polishing.
Oxidation is another local enemy. Vehicles parked outside in Rocklin or Citrus Heights often develop a chalky haze. A strong compound restores color, but severe cases may need multiple passes.
Final Prep: The IPA Wipe and Inspection
After correction, a final IPA wipe removes any polishing oils. This step is critical—even a trace of residue can prevent the ceramic coating from bonding properly.
We then inspect the paint under LED lights and a paint depth gauge to confirm uniformity. Only when the surface is flawless do we proceed to ceramic coating, PPF, or services like wheel and brake caliper ceramic coating.
Beyond Paint: Full-Vehicle Protection in Roseville
Paint correction sets the stage, but full protection often includes PPF for high-impact areas, ceramic window tint for UV/heat rejection, and interior ceramic protection to shield dashboards from cracking under Roseville’s sun.
For fleets or commercial vehicles in Antelope or Lincoln, we tailor packages to balance durability and cost. Wheel ceramic coating, for example, resists brake dust and simplifies cleaning—ideal for daily drivers.
How to Maintain Your Ceramic Coating in Roseville’s Climate
Proper upkeep extends your coating’s life and keeps your paint looking pristine.
- 1Wash Regularly
Use a pH-neutral car shampoo and the two-bucket method every 2 weeks. Roseville’s dust and pollen stick to hydrophobic coatings, so frequent washing prevents buildup.
- 2Dry Thoroughly
Use a high-quality microfiber towel or blower to prevent water spots. Hard water in the area can etch if left to dry.
- 3Avoid Automatic Car Washes
Brushes and harsh chemicals strip coatings and introduce swirls. Stick to touchless or hand washes.
- 4Reapply Maintenance Sprays
Every 3-6 months, use a ceramic boost spray to refresh hydrophobicity. This is especially useful before Roseville’s hot, dry summers.
- 5Address Contaminants Immediately
Bird droppings, tree sap, or bug splatter should be removed ASAP with a detailer spray. These can etch through coatings if left untreated.
Frequently Asked Questions
How long does paint correction take before ceramic coating in Roseville?
Most vehicles require 2-4 hours for correction, depending on paint condition and size. Severe oxidation or deep scratches may extend this. We always inspect first to provide an accurate timeline.
Can you ceramic coat a car with swirl marks?
No—coating over swirls locks them in permanently. Paint correction is mandatory to remove swirls, scratches, and other defects before applying any ceramic coating or PPF.
Is paint correction necessary for new cars in Ceramic Coating Roseville?
Yes, even new cars often have dealer-installed swirls, rail dust, or factory defects. A light polish ensures the surface is pristine before coating, maximizing gloss and longevity.
What’s the difference between paint correction and a basic detail?
A basic detail focuses on cleaning and light enhancement, while paint correction is a multi-step process to remove defects and restore clarity. For ceramic coating, correction is essential to achieve a flawless bond.
How often should I reapply ceramic coating in Roseville’s climate?
Professional-grade ceramic coatings last 3-5 years with proper maintenance. However, Roseville’s intense UV exposure and seasonal dust may require a maintenance spray every 6 months to sustain performance.
Do you offer paint correction for motorcycles or RVs in areas like Granite Bay?
Absolutely. Our paint correction and ceramic coating services extend to motorcycles, RVs, and fleet vehicles. The process is adapted for each surface type, ensuring optimal results whether it’s a bike, boat, or commercial truck.